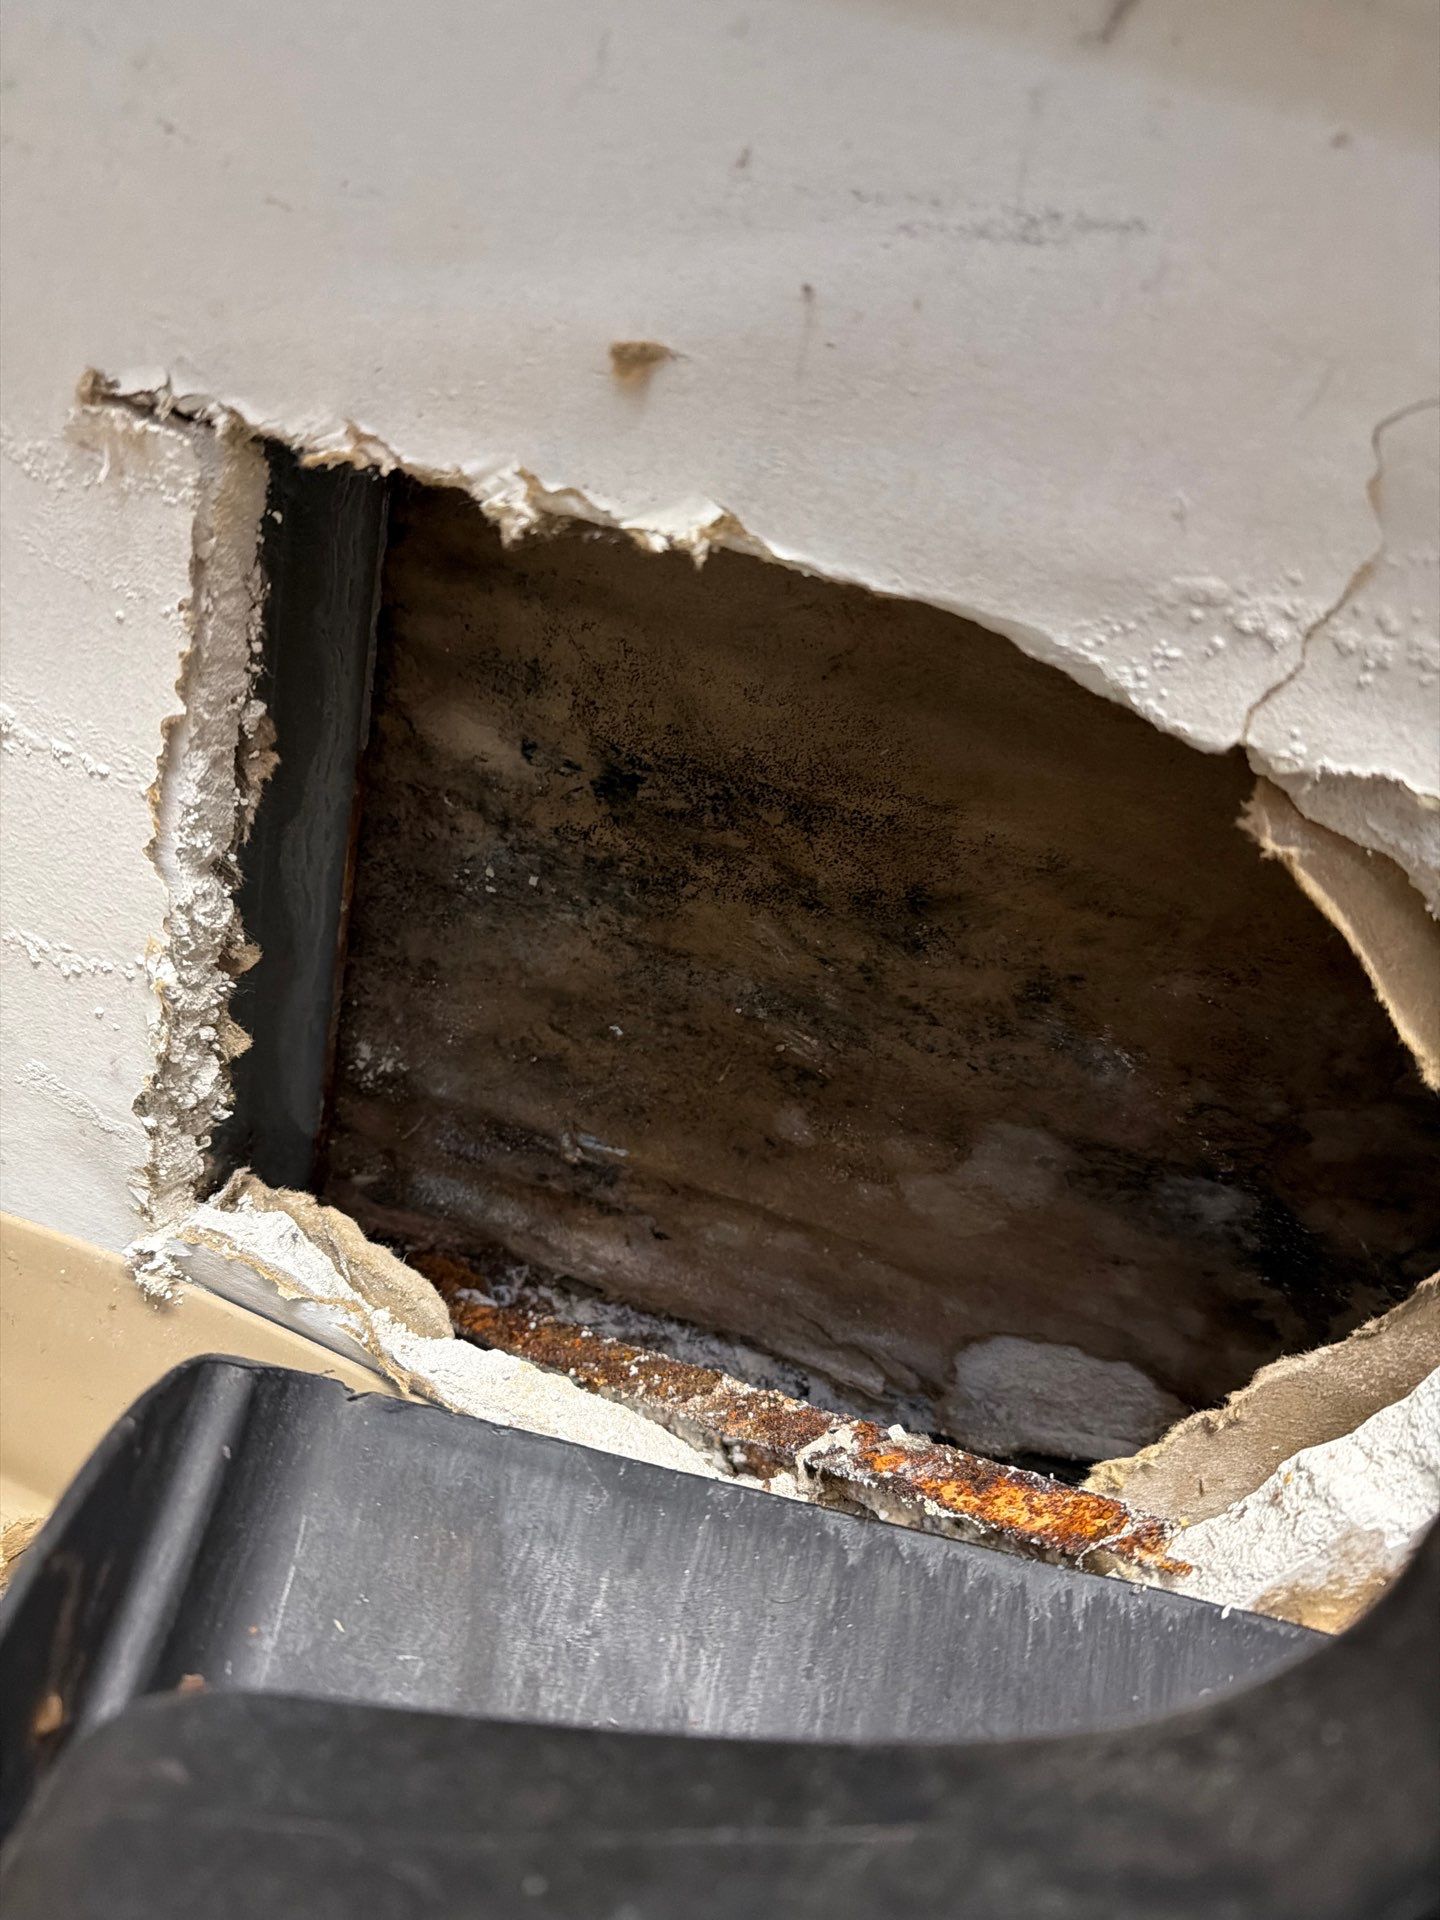
Problem: You Suspect a Leak But Cannot See the Source
The hardest part of a hidden leak is confirming it exists. Water travels along studs, pipes, and the bottom plate of a wall before it shows up as a visible stain. By the time a discoloration appears on your drywall, the actual leak point may be three to ten feet away, sometimes on a different floor entirely. Spring Hill homes built before 1990 are especially prone to this, since older copper joints and galvanized supply lines fail at hairline cracks that drip slowly for months.
You will notice indirect clues first. A water bill that jumped 20 to 40 percent without changes in usage. A faint musty smell in one room. Paint that looks slightly puffy or cracked in a straight line. Warm spots on a wall near a bathroom. Wood floors cupping along one edge. None of these confirm a leak on their own, but two or more together almost always do.
Pay attention to seasonal patterns as well. A leak that worsens during winter often points to a pressurized supply line near an exterior wall, where freezing temperatures stress fittings. A leak that shows up only after heavy rain suggests flashing failure or a roof penetration rather than plumbing. Tracking when symptoms appear gives a technician a head start before any equipment comes out of the truck.
Solution: Use Layered Detection Before Opening the Wall
Cutting drywall blindly is expensive and often misses the source. At Spring Hill Water Restoration, we use a layered detection process so we only open the wall where it matters:
- Moisture meters (pin and pinless) to map the wet zone across drywall, baseboards, and flooring.
- Thermal imaging cameras to spot temperature differences caused by evaporative cooling from trapped water.
- Acoustic listening devices for pressurized supply lines, which often hiss faintly through framing.
A good technician maps the moisture pattern first, then traces it back to the highest concentration point. That is usually within a few inches of the actual leak. For pressurized line leaks, we sometimes shut the main and watch the water meter for movement, which confirms an active supply leak before we cut anything. On drain lines, we may fill the affected fixture and watch the moisture meter respond in real time, which isolates whether the issue is on the supply side or the waste side without guesswork.
Problem: The Leak Is in a Ceiling, Not a Wall
Ceiling leaks behave differently. Water pools above the drywall, sags the surface, and often drops suddenly when the paper backing fails. If you see a bulge, do not stand under it. Puncture the lowest point with a screwdriver from the side, drain into a bucket, and call for help. The fix follows similar logic but adds gravity and electrical risk, since junction boxes and recessed lights are often nearby. Our team covers this scenario in detail on the ceiling water damage repair guide.
Solution: Contain, Remove, and Dry to Standard
When we find mold inside a wall in Spring Hill, we follow a contained removal process. We seal the room with plastic and negative air pressure, cut affected drywall back to at least 12 inches past the visible damage, remove wet insulation, HEPA vacuum the cavity, and apply an antimicrobial. Then we run commercial air movers and dehumidifiers until framing moisture content drops below 16 percent, which typically takes three to five days. You can read more about how we handle these jobs on our water damage restoration service page, including timelines and what to expect day by day.
Solution: Stop the Source, Then Restore
Whatever the location, the order is the same. Stop the active water. Map the moisture. Remove unsalvageable materials. Dry the cavity to standard. Rebuild. Skipping any step turns a $3,000 job into a $15,000 mold remediation later. The homeowners who fare best are the ones who act on the first clue rather than waiting for a second opinion from the stain on the ceiling.
Problem: The Leak Has Been Active Long Enough for Mold
Once a wall cavity stays wet beyond 48 hours, mold colonies establish on the paper backing of drywall and on wood framing. This is not the visible black surface mold you scrub off a shower. This is hidden microbial growth that releases spores every time your HVAC kicks on. Family members may develop headaches, congestion, or asthma flare-ups without connecting it to the wall.
The IICRC classifies this as a Category 2 situation in most cases, sometimes Category 3 if the source is a sewage line or long-stagnant water. Category determines how aggressive the remediation has to be, and it also affects what your insurance will cover under sudden and accidental loss language. In Spring Hill, humidity levels can push a Category 1 clean water loss into Category 2 territory within a day or two if the cavity stays sealed, so timing matters as much as the original water source.
Problem: You Do Not Know If Insurance Will Cover It
Hidden leaks are a gray area for most policies. Sudden and accidental events (a burst supply line, a failed washing machine hose) are usually covered. Long-term seepage from a slow drip is often excluded as a maintenance issue. The line between the two comes down to documentation and how the claim is described.
Solution: Document Before You Touch Anything
Before any cleanup begins, take photos and short videos of every visible sign of damage. Note when you first noticed the issue. Save your water bills if usage spiked. When Spring Hill Water Restoration arrives, our technicians produce moisture maps, photo logs, and IICRC-aligned scope reports that adjusters recognize. If your situation involves a supply line failure, our guide on burst pipe water damage and repair cost walks through the claim language adjusters look for.
If your adjuster pushes back, ask for the specific policy language being cited and request a reinspection with our technician present. Many denials get reversed once a qualified restorer walks through the moisture data and explains the failure mode in plain terms.